rsync不用过多介绍。他是linux系统下的免费开源数据镜像备份工具,使用快速增量备份工具Remote Sync可以远程同步,支持本地复制,或者与其他SSH、rsync主机同步,兼容第三方跨平台客户端。并且rsync通常用于存储服务器节点内部,存储服务器节点之间文件、文件夹的拷贝和遍历等操作,使用方式大致分为两种:
1. rsync基本使用
2. rsync daemon模式使用
这里着重介绍rsync daemon模式,第一种模式网上有好多示例比较简单,rsync daemon模式如果是存储节点之间做数据传输,无需每次输入密码。
1、rsync daemon模式
rsync daemon模式分为客户端跟服务端,如果客户端想要使用rsync,服务端必须启动rsync;
rsync以daemon方式运行的时候使用配置文件为rsyncd.conf;
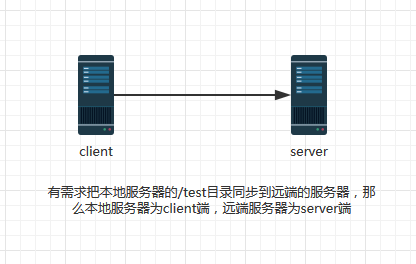
使用daemon模式的时候,一定要分清楚服务端和客户端,与平时理解的服务端与客户端不太一样;
被同步的一端为服务端,要把文件同步到另一端的源端为客户端。

2、文件格式
1) rsyncd.conf配置文件由模块和参数组成,一个模块以写在方括号里的模块名称开始,直到下一个模块,模块里包含由“name = value”格式的参数。
2)文件是基于行的,每一行代表一个模块名或者参数。
3、启动方式
daemon模式运行必须启动的时候加参数 --daemon
rsync --daemon
4、模块配置
4.1、服务端(目标端,被同步的一端)的配置文件:
# /etc/rsyncd: configuration file for rsync daemon mode
# See rsyncd.conf man page for more options.
# configuration example:
uid = root
gid = root
use chroot = no
max connections = 200
pid file = /var/run/rsyncd.pid
log file = /var/log/rsyncd.log
lock file = /var/run/rsyncd.lock
[test]
path = /captain/shell
read only = no
auth users = rsync
secrets file = /etc/rsyncd.secrets
list = no
uid = root
gid = root
use chroot = no
max connections = 200
timeout = 300
pid file = /var/run/rsyncd.pid
lock file = /var/run/rsync.lock
log file = /var/log/rsyncd.log
ignore errors
read only = false
list = false
auth users = rsync
secrets file = /etc/rsync.password
[backup]
comment = "backup dir by oldboy"
path = /root/target_backup
1)uid、gid:当使用非root账号时,那么一定要确保服务的的文件夹是否有该非root账号写入的权限
2)use chroot = no :是否可以切换到root目录,当chroot为yes的时候,客户端连接模块的时候,先chroot到模块参数指定的目录下,必须使用root权限,端口号必须是1024以内,且不能备份path路径外的链接文件
3)max connections = 200 :表示同时最大的连接数,也就是同时只能有两个客户端对自己进行连接

并且此选项必须与lock file = /var/run/rsyncd.lock 共同使用,若不指定,默认为/var/run/rsyncd.lock
4)path = /captain/shell:表示的是当客户端把数据同步过来将保存的路径
5)read only = no :如果为只读,那么将不能进行写同步,所以必须关闭

6)auth users = rsync :用来进行同步的用户,不需要系统用户中有,虚拟的就行
7)secrets file = /etc/rsyncd.secrets :表示的是账号密码文件,此文件可随意指定,文件里必须以username:password的格式
rsync:123456
此文件权限必须为600,否则会报错

8)list = no :表示的是当服务端拒绝客户端的请求时,是否是直接显示权限拒绝,还是现实模块不存在,一般与hosts allow 和hosts deny一起使用
当一个被服务端拒绝的请求进来时,如果设置为 list = no,那么直接返回模块不存在

如果不设置,那么是什么错就返回什么错

4.2、客户端配置文件:
客户端(源端,需将此台机器上的文件同步出去)的配置文件只需做简单的修改,设置日志文件和pid文件路径,然后启动rsync即可
# /etc/rsyncd: configuration file for rsync daemon mode
# See rsyncd.conf man page for more options.
# configuration example:
#uid = root
#gid = root
#use chroot = yes
#max connections = 4
pid file = /var/run/rsyncd.pid
log file = /var/log/rsyncd.log
# exclude = lost+found/
# transfer logging = yes
# timeout = 900
# ignore nonreadable = yes
# dont compress   = *.gz *.tgz *.zip *.z *.Z *.rpm *.deb *.bz2
# [ftp]
#        path = /home/ftp
#        comment = ftp export area
设置喵喵vim /etc/rsyncd.passwd
123456
同步命令:
rsync -avz --password-file=/etc/rsyncd.passwd /data/shell/ rsync@192.168.1.103::test
-avz:表示同步过程中输出信息显示的格式
--password-file=/etc/rsyncd.passwd :表示客户端将拿此密码去服务端进行认证,所以这个文件里的秘密为上面服务的所设置的密码,只需passwd
/data/shell/ :表示源目录,将要把此目录下的所有文件同步到远端。
注:这里有无/的区别:有/的时候表示的是/data/shell/目录下的东西同步过去,而无/的时候表示的是把shell目录同步过去
同步报错:

表示远端配置文件里所设置的路径不存在,所有得先创建目录。
5、一些常用同参数解释:
port=888    # 指定rsync端口。默认873
uid = rsync # rsync服务的运行用户,默认是nobody,文件传输成功后属主将是这个uid
gid = rsync # rsync服务的运行组,默认是nobody,文件传输成功后属组将是这个gid
use chroot = no # rsync daemon在传输前是否切换到指定的path目录下,并将其监禁在内
max connections = 200 # 指定最大连接数量,0表示没有限制
timeout = 300         # 确保rsync服务器不会永远等待一个崩溃的客户端,0表示永远等待
motd file = /var/rsyncd/rsync.motd   # 客户端连接过来显示的消息
pid file = /var/run/rsyncd.pid       # 指定rsync daemon的pid文件
lock file = /var/run/rsync.lock      # 指定锁文件
log file = /var/log/rsyncd.log       # 指定rsync的日志文件,而不把日志发送给syslog
dont compress = *.gz *.tgz *.zip *.z *.Z *.rpm *.deb *.bz2  # 指定哪些文件不用进行压缩传输

###########下面指定模块,并设定模块配置参数,可以创建多个模块###########
[bigtera1]        # 模块ID
path = /vol/bigtera2 # 指定该模块的路径,该参数必须指定。启动rsync服务前该目录必须存在。rsync请求访问模块本质就是访问该路径。
ignore errors      # 忽略某些IO错误信息
read only = false  # 指定该模块是否可读写,即能否上传文件,false表示可读写,true表示可读不可写。所有模块默认不可上传
write only = false # 指定该模式是否支持下载,设置为true表示客户端不能下载。所有模块默认可下载
list = false       # 客户端请求显示模块列表时,该模块是否显示出来,设置为false则该模块为隐藏模块。默认true
hosts allow = 192.0.0.0/24 # 指定允许连接到该模块的机器,多个ip用空格隔开或者设置区间
hosts deny = 0.0.0.0/32   # 指定不允许连接到该模块的机器
auth users = rsync_backup # 指定连接到该模块的用户列表,只有列表里的用户才能连接到模块,用户名和对应密码保存在secrts file中,
                          # 这里使用的不是系统用户,而是虚拟用户。不设置时,默认所有用户都能连接,但使用的是匿名连接
secrets file = /etc/rsyncd.passwd # 保存auth users用户列表的用户名和密码,每行包含一个username:passwd。由于"strict modes"
                                  # 默认为true,所以此文件要求非rsync daemon用户不可读写。只有启用了auth users该选项才有效。
[bigtera2]    # 以下定义的是第二个模块
path=/vol/storcls-s3
read only = false
ignore errors
comment = anyone can access


网友留言: